Portuguese Pastel de Nata at Home: A Beginner's Guide to Flaky Custard Tarts
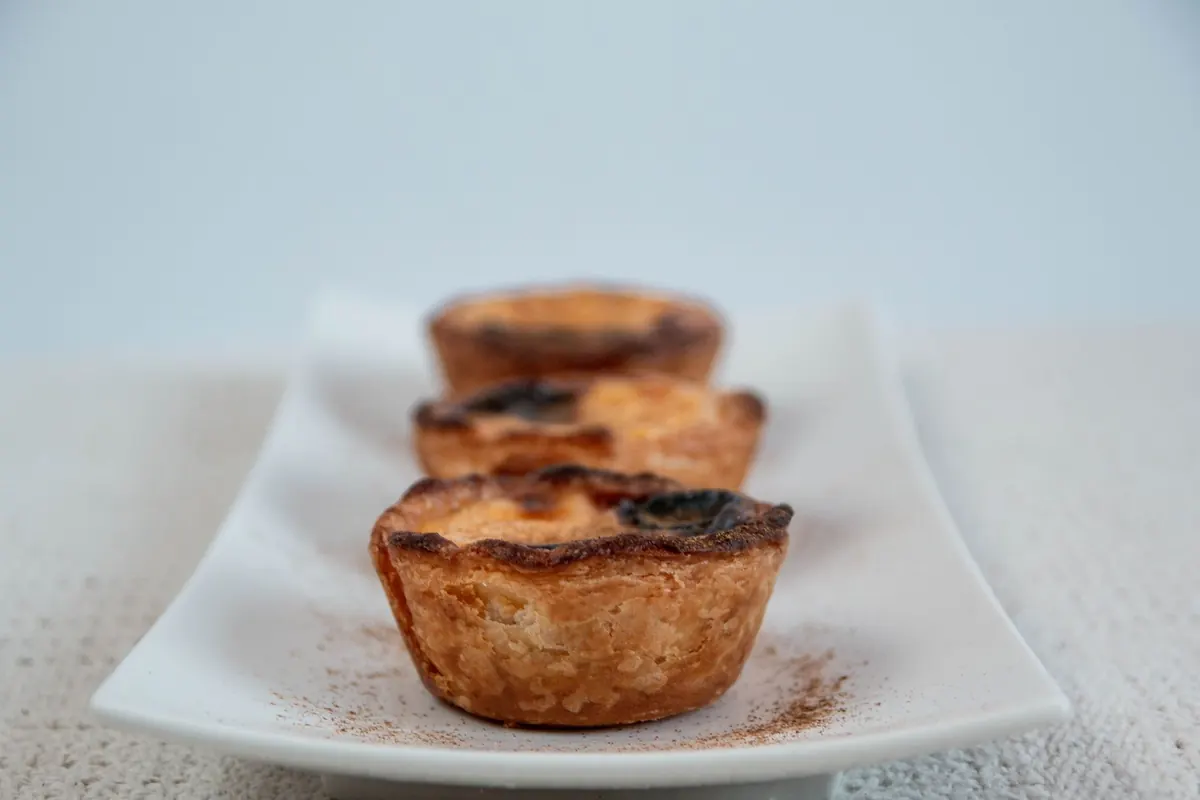
Pastéis de nata look like the work of a pastry kitchen with a marble slab, a dough sheeter and a lot of patience. They aren't, at least not the home version. A roll of all-butter puff pastry, a custard made on the hob, and an oven turned as hot as it will go will get you most of the way there. What comes out is not identical to the tarts sold in Lisbon, but it has the three things that matter: shattering layers, a custard set just past pourable, and dark, bitter-sweet blisters across the top.
What Makes a Pastel de Nata Work
Three things, and they pull against each other. The pastry wants a moderate oven so the butter layers puff before they color. The custard wants fierce top heat so it caramelizes into those trademark spots. Most disappointing home batches fail because the shells dry out and brown while the custard stays pale and flat.
The fix is simple: thin shells, a custard that starts cold, and an oven hotter than you would normally dare. Heat from below sets the pastry fast; heat from above does the blistering. Once you accept that the custard should look almost burnt in places, the whole process gets easier.
The Shortcut Dough, and Why It's Fine
Traditional nata dough is laminated by hand, rolled into a giant sheet, spread with softened butter and coiled into a log. The coil is what creates the spiral of layers you see in the base of a finished tart. You can imitate that structure with puff pastry and about five minutes of work.
Buy a block of all-butter puff pastry rather than the pre-rolled sheets, which crack when you try to handle them. Roll it into a rectangle roughly 3mm thick, then roll it up tightly from the long side into a cylinder. Chill it for half an hour so the layers firm up, then slice the log into twelve discs about 1.5cm thick.
Pressing the Shells
Work one disc at a time into a standard muffin tin. Flour your thumbs and press from the centre outward, pushing the dough up the sides until the rim sits a few millimetres above the edge of the cup. Aim for an even thickness, maybe 3mm at the base and slightly thicker where the sides meet the tin. Stretching the base too thin is the most common cause of a soggy tart.
Use a light-coloured metal tin if you have one. Dark non-stick pans run hot and will scorch the bases before the custard sets. Put the filled tin in the freezer for fifteen minutes while you make the custard, or cover and refrigerate for up to a day.
The Custard, Step by Step
This is a stirred custard thickened with a little cornflour, which makes it far more forgiving than an egg-only version. It will not curdle if you keep the heat moderate.
- Warm 240ml whole milk with a strip of lemon zest and a short cinnamon stick until it steams. Take it off the heat and let it steep for ten minutes.
- In a bowl, whisk 70g caster sugar with 2 level tablespoons of cornflour until no lumps remain. Whisk in 4 egg yolks.
- Fish out the zest and cinnamon. Pour the warm milk into the yolk mixture in a thin stream, whisking constantly so the eggs warm gradually.
- Return everything to the pan and cook over medium-low heat, stirring with a spatula and scraping the base, until it thickens to the texture of thick pouring cream. This takes three to five minutes. Do not let it boil.
- Off the heat, stir in 100ml double cream and a teaspoon of vanilla. Taste and add a spoonful more sugar if you like a sweeter tart.
- Cool to room temperature, pressing cling film directly onto the surface so it does not form a skin. If the custard seems stiff, loosen it with a splash of milk; it should pour easily from a jug.
Baking for Blisters
Heat the oven to 260°C, or as high as it will go, with a rack in the upper third and nothing else inside. Give it a full twenty-five minutes to come up to temperature. Fill each chilled shell about three-quarters full, no more, because the custard puffs dramatically in the first few minutes.
Bake for eleven to fifteen minutes. You are looking for pastry edges that are deep golden and a custard surface blistered with brown and near-black spots. If the pastry is colouring but the custard is still pale after twelve minutes, switch on the grill for one to two minutes, keeping the door ajar and your eyes on it.
The difference between a pale nata and a proper one is usually about two minutes of nerve. When you think they are dark enough, give them one more minute.
The Moment to Pull Them
The custard will rise like a soufflé and then sink and crack as it cools. That is normal, and it is how a nata should look. Pull the tray when the spots are dark, not merely golden. Serve them within twenty minutes, dusted with cinnamon and a little icing sugar, with an espresso alongside.
Troubleshooting
- Watery custard: it was boiled or overcooked. Cook gently until just thickened, and cool it quickly with cling film on the surface.
- Soggy bases: shells were filled too far in advance, or the oven was not hot enough. Fill straight from the freezer and bake on a thoroughly preheated rack.
- No blisters: the rack was too low, or a baking sheet below the tin blocked the heat. Move the tin up and use the grill if needed.
- Tough, bready pastry: too much pressure when pressing the shells, or dough that was handled warm. Chill it and press gently.
- Rubbery custard: too much cornflour. Level the tablespoon rather than heaping it.
Make-Ahead and Reheating
The custard keeps for three days in the fridge. Stir it before use and thin it with a splash of milk; it thickens considerably when cold. Pressed, unfilled shells can be frozen solid on a tray, then bagged for up to a month and filled straight from frozen, adding a minute or two to the bake.
Baked tarts are at their best within a couple of hours. After that, cool them completely and keep them in a tin at room temperature for a day. To bring them back, bake at 200°C for four to six minutes, or in an air fryer at 180°C for about three minutes, until the pastry crisps and the custard softens. A microwave will leave you with limp pastry and a hot, gluey filling, which is a worse outcome than eating them cold.
If you want a lighter version, make them smaller rather than fiddling with the ratios; the custard needs its sugar and fat to caramelize properly. Anyone managing blood sugar or cholesterol should treat these as an occasional treat and follow their own professional advice.
Serve Them Warm, and Don't Wait
A pastel de nata is a fifteen-minute dessert. Everything before that is preparation. Once the tin comes out, the clock is running, and the tart you eat standing at the counter with cinnamon on your fingers will be better than any you carefully plate an hour later. Make twelve, share them, and keep the custard in the fridge for the next batch.
Photo: Regina Ferraz / Pexels